


 - from 1 Unit")
 - from 1 Unit")
 - from 1 Unit")
 - from 1 Unit")

 - Li (DORMANT, BARE-ROOTED)")
 - from 1 Unit")
 - from 1 Unit")
 in 50 mm Tube")
 in 50 mm Tube")
 - from 1 Unit")
 Creeping Groundcover Plant in 50 mm Round Propagation Pot")
 - from 1 Unit")
 - from 1 Unit")
 - from 1 Unit")

 in 90 mm Bottomless Pot")
")
 in 200 mm Green Hanging Basket")
 in Matte \"Sea Foam\" Ceramic Pot")


 in 9 L Air-Pot Container")
 'Northern Star' (POTTED)")
 in 90 mm Bottomless Pot")
 in 50 mm Tube")


Title image above is copyright © Kristi Ellinopoullos
First published 11th June 2025
Introduction to the Structure of Sugarcane
Sugarcane is super easy to propagate — possibly the hardest part is deciding which of the three different ways suits you best!
(There is a fourth way not covered here, and that is to grow from seed.)
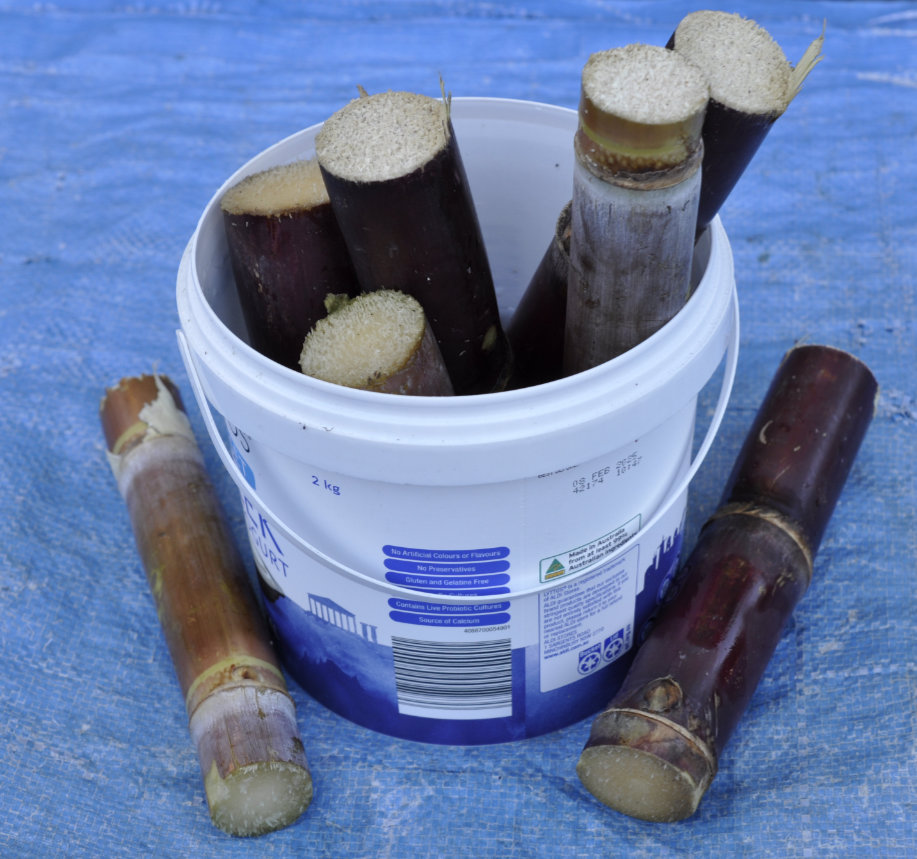
The three ways covered here require a piece of sugarcane stalk, and new plants will be clones of this original.
But first, let’s backtrack and analyse a sugarcane stalk so as to understand what we’re looking at and how to make it grow.
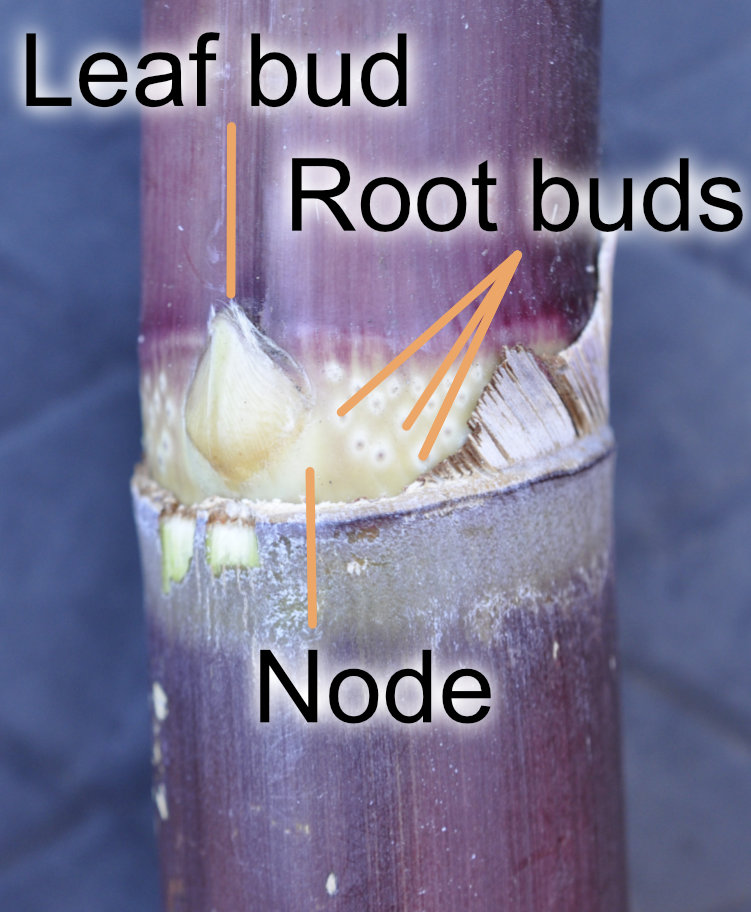
A sugarcane stalk, like bamboo, has very distinct nodes — the thick rings between each segment. Each of those segments is botanically called the internode.

copyright © Kristi Ellinopoullos
The node of any plant is where the buds are found and where leaves and branches attach to a stem (leaves and branches arise from the buds).
In the photo above you can see how the base of the leaf is attached to a node. Not visible, but further up and down that stem are other leaves attached to other nodes.
Here is a piece of sugarcane with the leaf base visibly wrapped around the stem. Note the orientation of that leaf — this way is up:

copyright © Kristi Ellinopoullos
Let’s remove the leaf remnant and zoom in — the orientation has not changed:
copyright © Kristi Ellinopoullos
There is only one of these bulbous secondary shoot buds per node, but the root buds (more correctly called root primordia, as in primordial root cells) circumnavigate the entire stem. The secondary shoot bud is always on the same side of the protruding node disk as the leaf base, and thus it is very easy to know which way is up at all times. This is important to know when propagating from a stem. The secondary shoot becomes the new main (replacement) stem of a propagated piece of sugarcane as the original gradually breaks down and rots away.
Three Ways to propagate a Sugarcane Stem
Method One: in Water
Submerse the stem(s) in a glass or bucket of water, such that at least one node is permanently covered and the stem is the right way up:
copyright © Kristi Ellinopoullos
Roots will grow right around the immersed node(s) and shoots will appear from the bulbous buds whether immersed or not. I’ll add a photo once these appear on the above pieces.
Method Two: Vertically in Soil or Potting Medium
Plant the stem such that at least one node is permanently covered and the stem is the right way up:
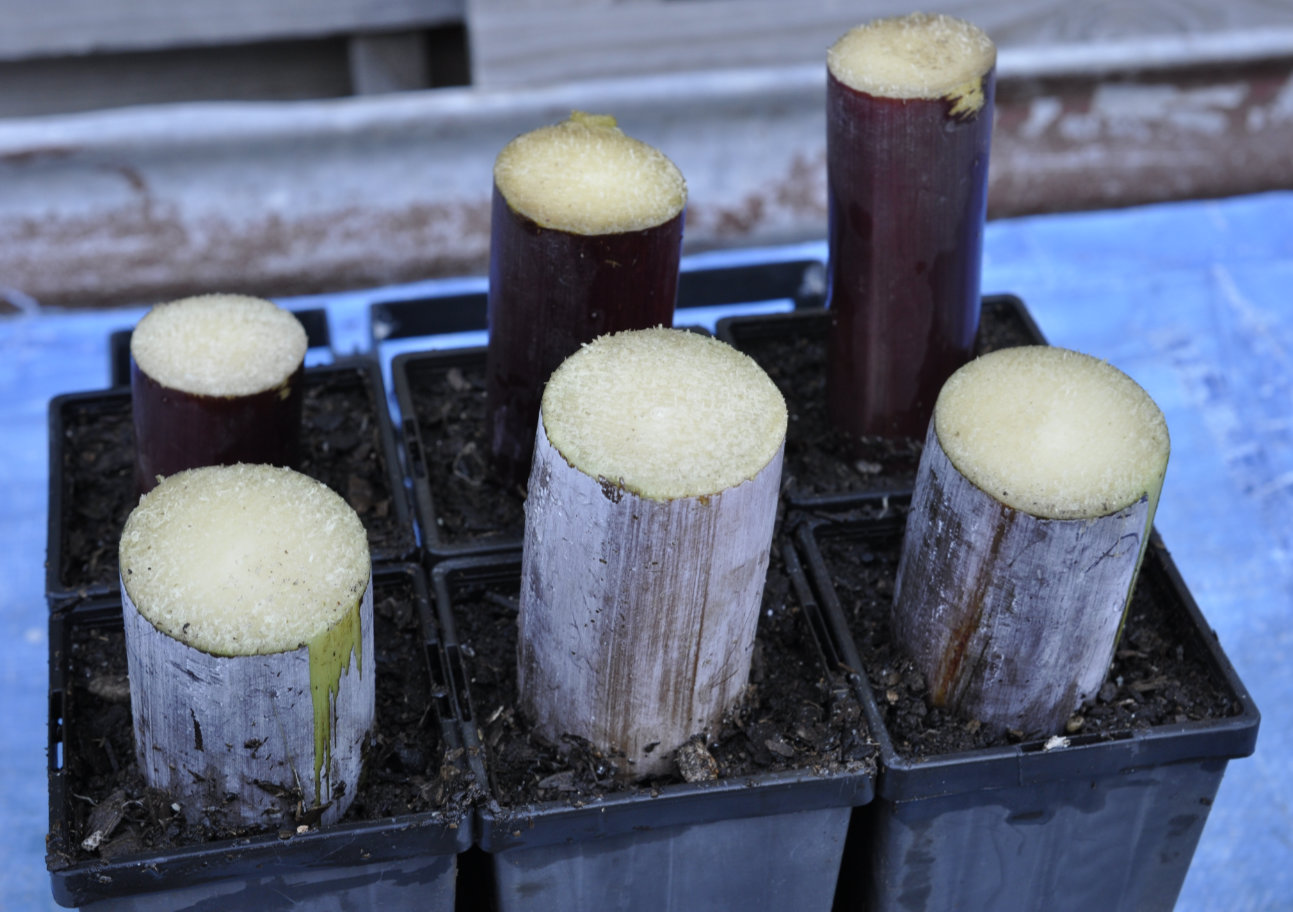
copyright © Kristi Ellinopoullos
Roots will grow from the buried node(s) and shoots will appear from the bulbous nodes whether buried or not. I’ll add a photo once shoots appear on the above pieces, but here is an older photo:
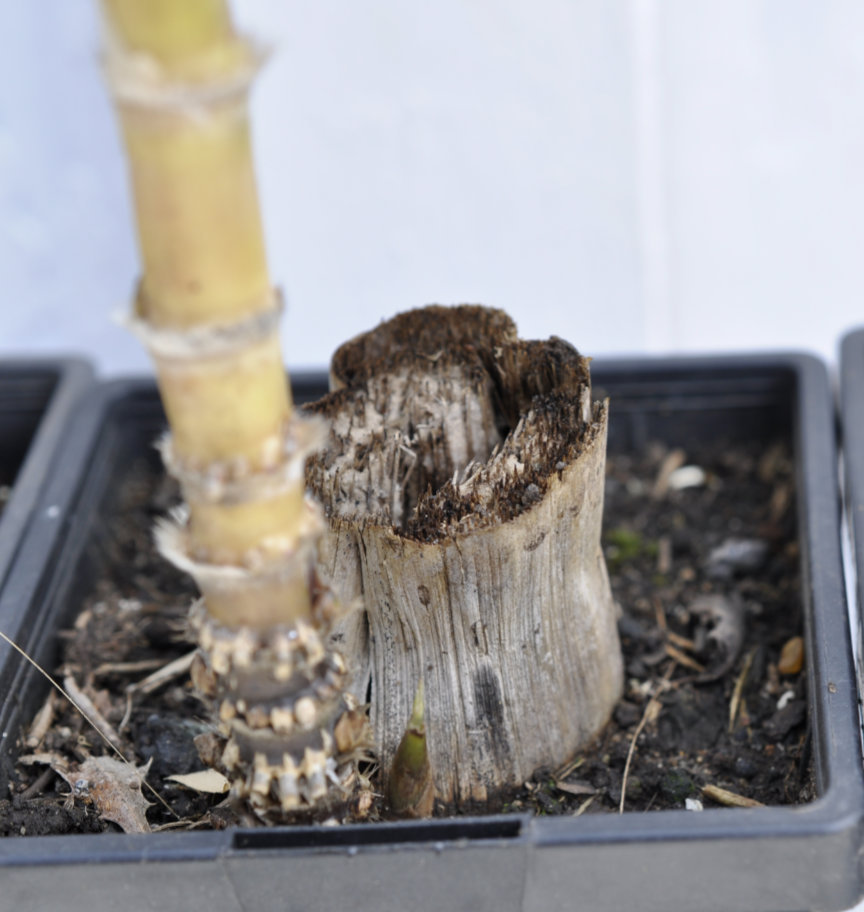
copyright © Kristi Ellinopoullos
Here you may just be able to make out a new green shot emerging from the soil at front. Roots are also growing out of the thin side stem which was attached to the main stem now fully spent.
It is perfectly normal for the buried stem to disintegrate this way, as it is breaking down to feed the new roots and shoots. This unsightly piece will eventually come away in the hand for removal.
Update: 9th December 2025
And here is one of the pieces I call Cultivar 1 (first row of three, two photos up) because I have no idea what it is:
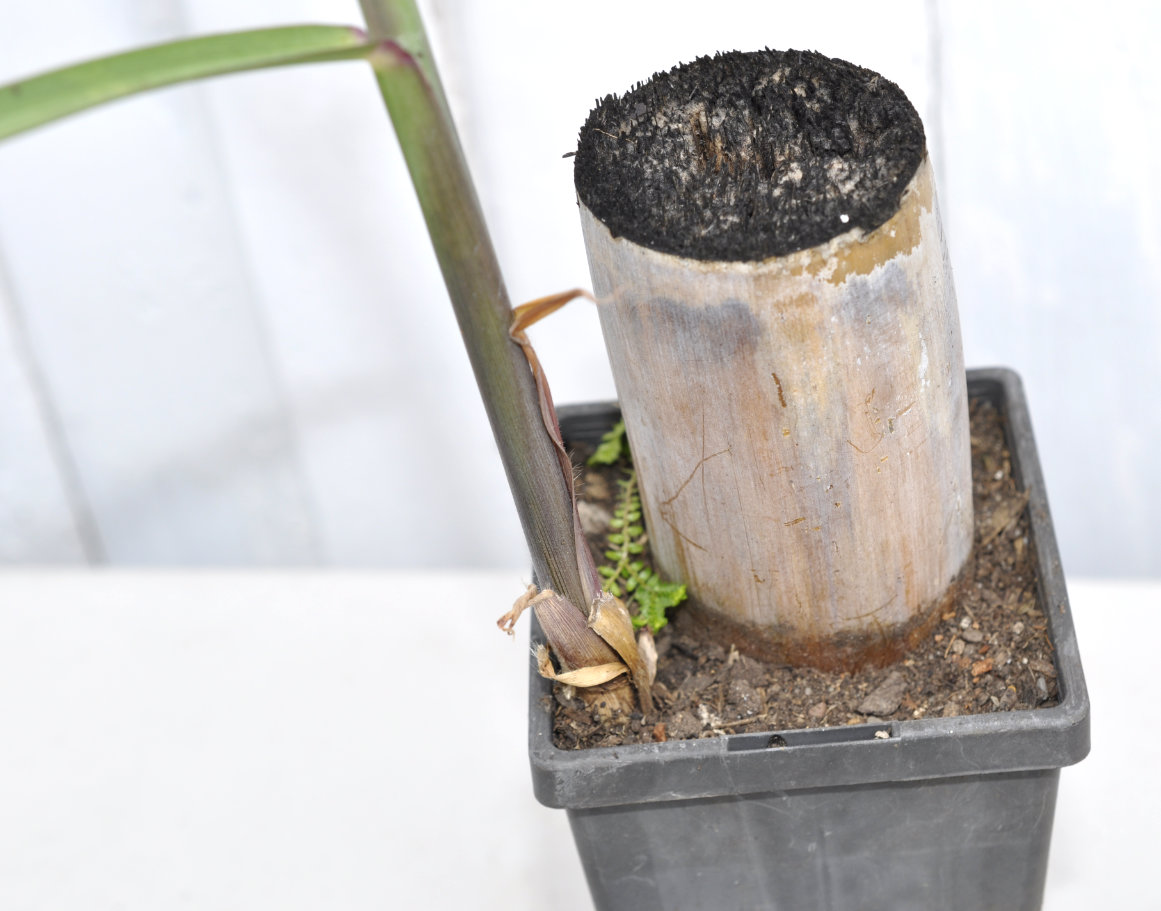
copyright © Kristi Ellinopoullos
(The green piece on the surface is a Selaginella friend.)
Here too you can see how the original stem is beginning to deteriorate.
Method Three: Horizontally in Soil or Potting Medium
Bury the stem shallowly, but fully, and horizontally in the ground. Shoots and roots will arise from all nodes along the stem. This method is best for establishing a clump where you intend it to be permanently, but there’s no reason why you can’t uplift it to divide the rooting and shooting sections to relocate in separate positions. A saw or heavy duty branch loppers are the best tools for this.
Conclusion
It can take from two weeks to two months or even more for anything to show, depending on the time of year. If new to this, I’d recommend the glass of water method, partly for your own reassurance the stem is not rotting, and partly because it is so much fun to see the roots developing! This is also the best way to grow a rooted piece during the colder months, as this can be done indoors anywhere it’s warm.
Related Products
, Cultivar 1 as Propagation Material")
 Sett (Stem Piece), Cultivar 1")
 Sett (Stem Piece), Cultivar 2")
, Cultivar 2 as Propagation Material")
Sugarcane Settling ( Rooted, Shooting Sett), Cultivar 1")
Sugarcane Settling ( Rooted, Shooting Sett), Cultivar 2")
 Setts (Stems): Cultivars 1 and 2")
1 Comment(s)
Hi there
Is your heirloom sugar cane softest to chew after peel the hard skin out?
How many sugarcane varieties do you have?
Is there the softest to chew
Kindly regard
Loc
Hi Loc, So sorry to only now be seeing this comment, but yes, I do find the two cultivars I have lovely to chew! They are of course still fibrous, but still soft and very juicy. I wrote about this here: https://wollongongnursery.com.au/wollongong-nursery-blog/how-to-prepare-homegrown-sugarcane-for-chewing
Leave a Comment