
 - from 1 Unit")
 - from 1 Unit")
 - from 1 Unit")
 - from 1 Unit")

 - from 1 Unit")
 - Li (DORMANT, BARE-ROOTED)")
 - from 1 Unit")
 in 50 mm Tube")
 in 50 mm Tube")
 - from 1 Unit")
 Creeping Groundcover Plant in 50 mm Round Propagation Pot")
 - from 1 Unit")
 - from 1 Unit")
 - from 1 Unit")

 in 90 mm Bottomless Pot")
 Cuttings in 50 mm Tube")
 Leaves For Potpourri")
 as Propagation Material")
 Settling, Cultivar 2, Potted")
 Settling, Cultivar 1, Potted")
Sugarcane Settling ( Rooted, Shooting Sett), Cultivar 2")


")

Title image above is copyright © Kristi Ellinopoullos
First published 21st November 2025
I like to grow saffron in a 38 L Air-Pot. The 20 L Air-Pot works too but you can’t fit as many in :)
Mind you, when I first began with just three corms, I grew each one in its own 3 L Air-Pot as a hedge against losing any of them. But they were tougher than I gave them credit for, and each went on to grow another two or three daughter corms each.
I like the Air-Pot for saffron as they provide the ideal growing environment of drainage and aeration which saffron needs, as well as makes the collecting of corms at the end of the season much easier and with zero damage, as you’ll see.
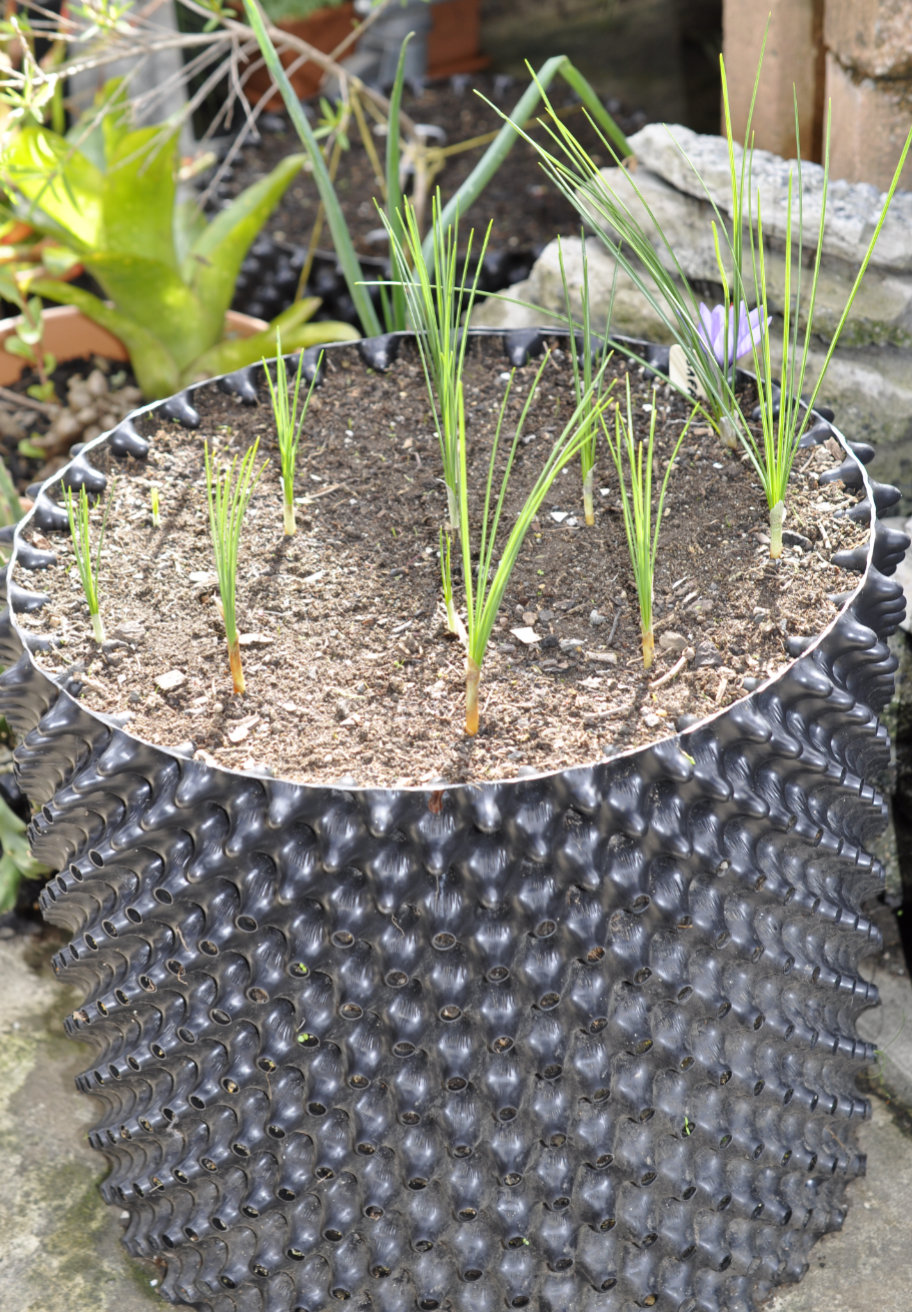
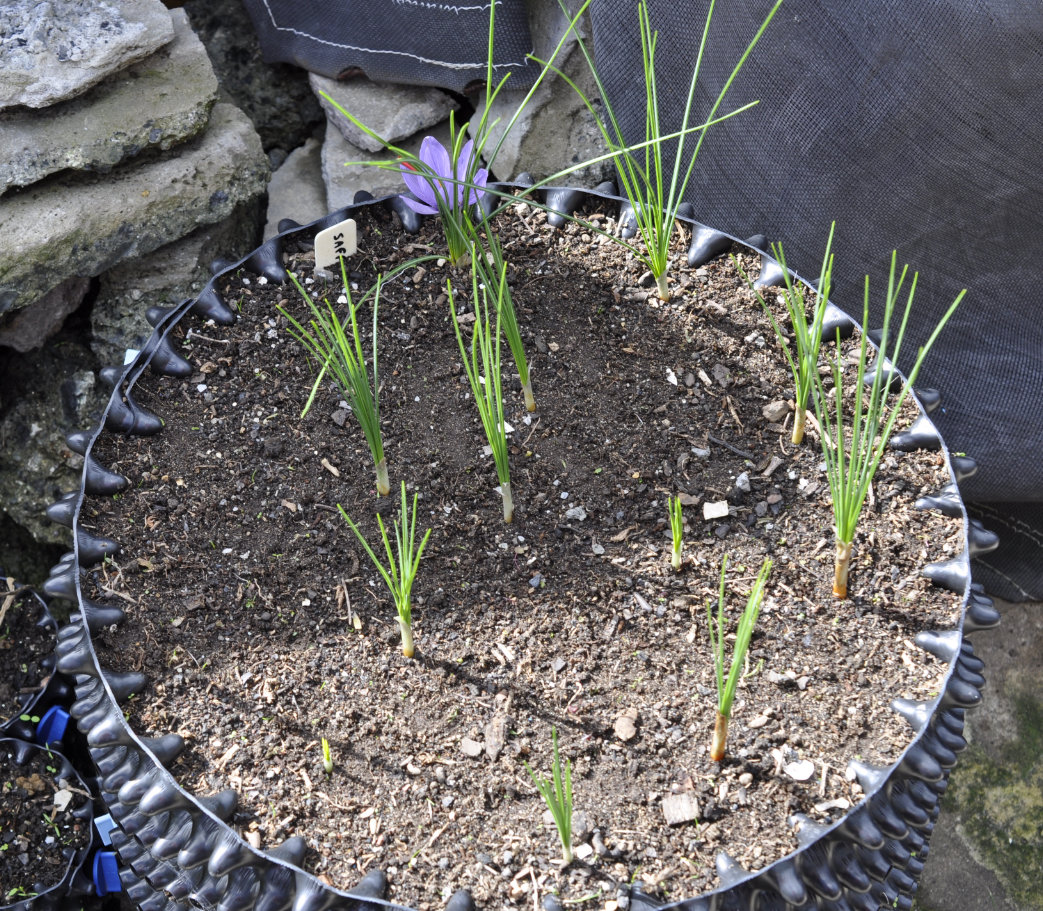
Back on the 14th February this year 2025 I planted the biggest/best fifteen corms I had into a 38 L Air-Pot packed half-half fine compost and coir. Saffron loves a medium rich in organic matter.
By the 5th May twelve of these had emerged and one had a flower!
copyright © Kristi Ellinopoullos
copyright © Kristi Ellinopoullos
After flowering in autumn, the corms spend all winter and spring growing daughter corms. The foliage dies down in spring and the corms are dormant all summer.
Now while it is fine to leave the corms in place in many cases, I lift mine during this dormant period for several reasons:
One: to divide them, as overcrowding over time leads to reduced flowering;
Two: to sort them by size, as size also determines flowering; and
Three: it is extremely difficult to grow saffron in this Wollongong climate. The autumns and winters aren’t cold enough. I need to trick the corms by placing them in the fridge so as to replicate the cold winter they need in order to flower at all.
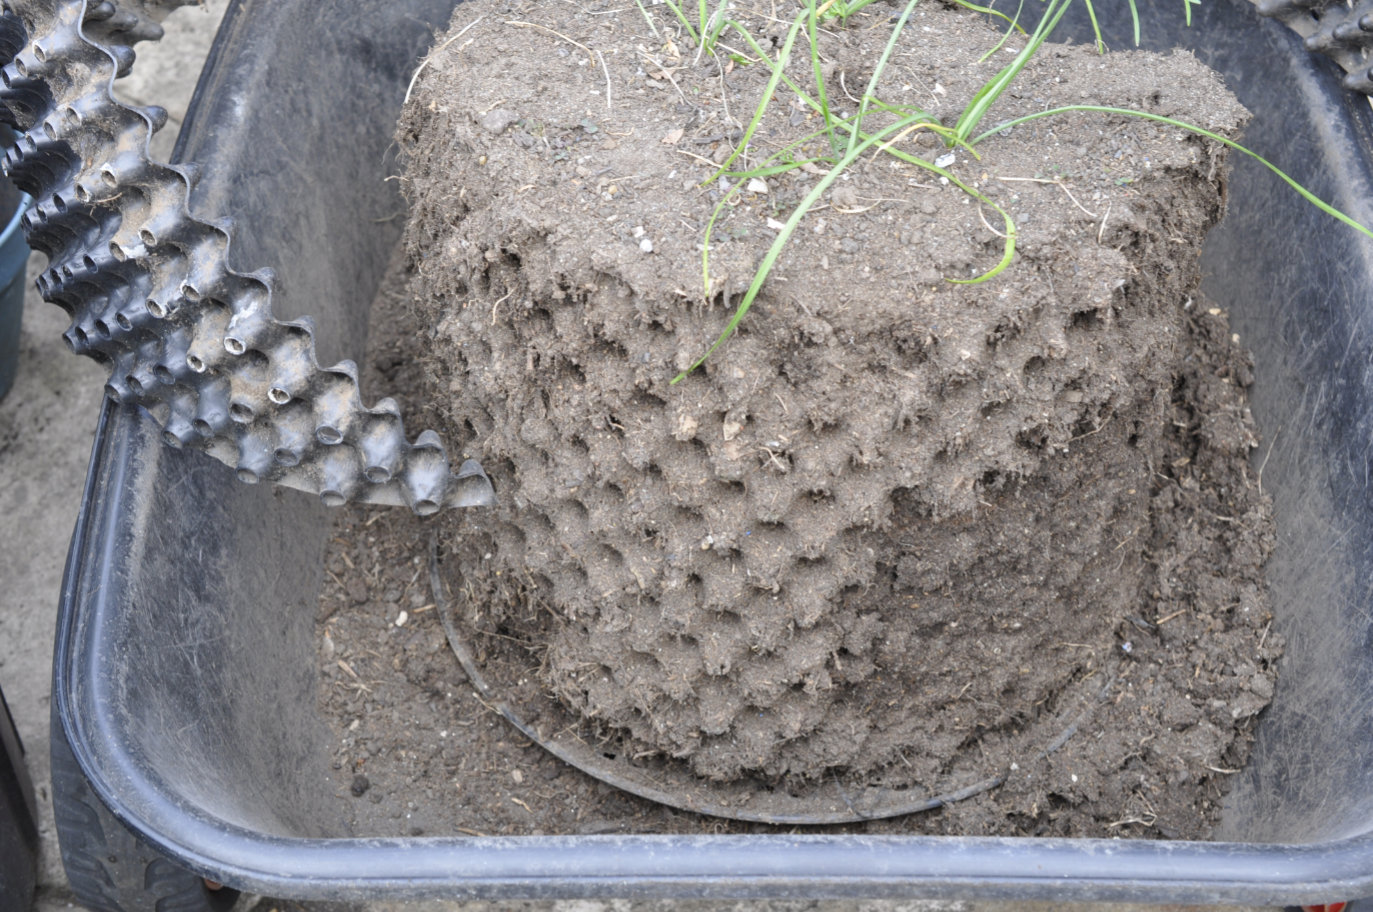
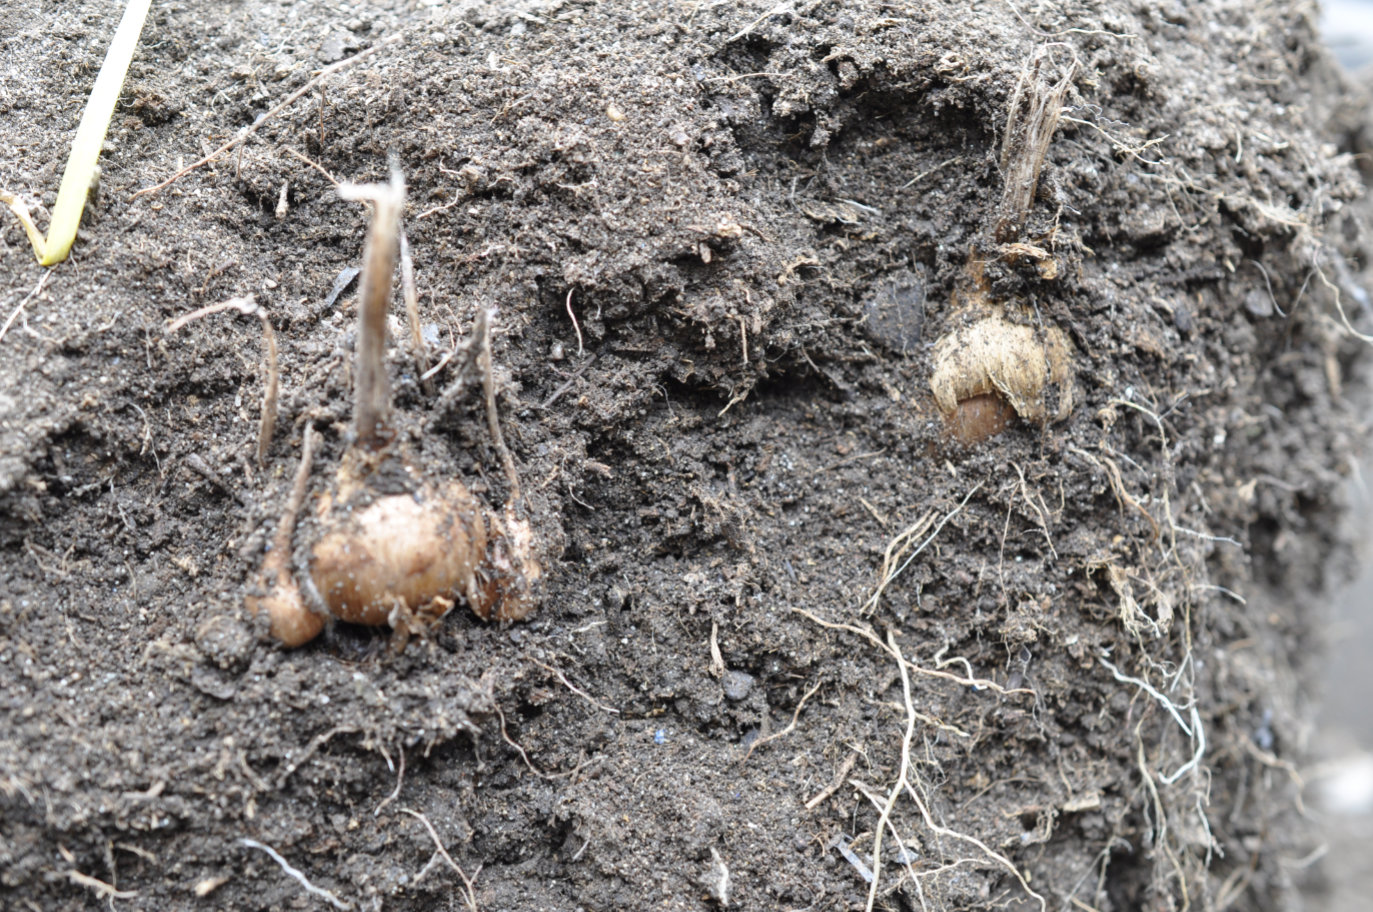
So a few weeks ago, on the 3rd November 2025 and after all saffron foliage had fully come away after the gentlest of tugs, I sat down to do this very thing. Too easy with an Air-Pot, as the wall comes away and the medium usually stays in place (the strappy leaves here are not saffron by the way, but the annoying onion weed). There is also zero risk of damaging the corms with a trowel or fork as would normally be used to lift them from a traditional garden bed:
copyright © Kristi Ellinopoullos

copyright © Kristi Ellinopoullos
Working from the outside in revealed these first two:
copyright © Kristi Ellinopoullos
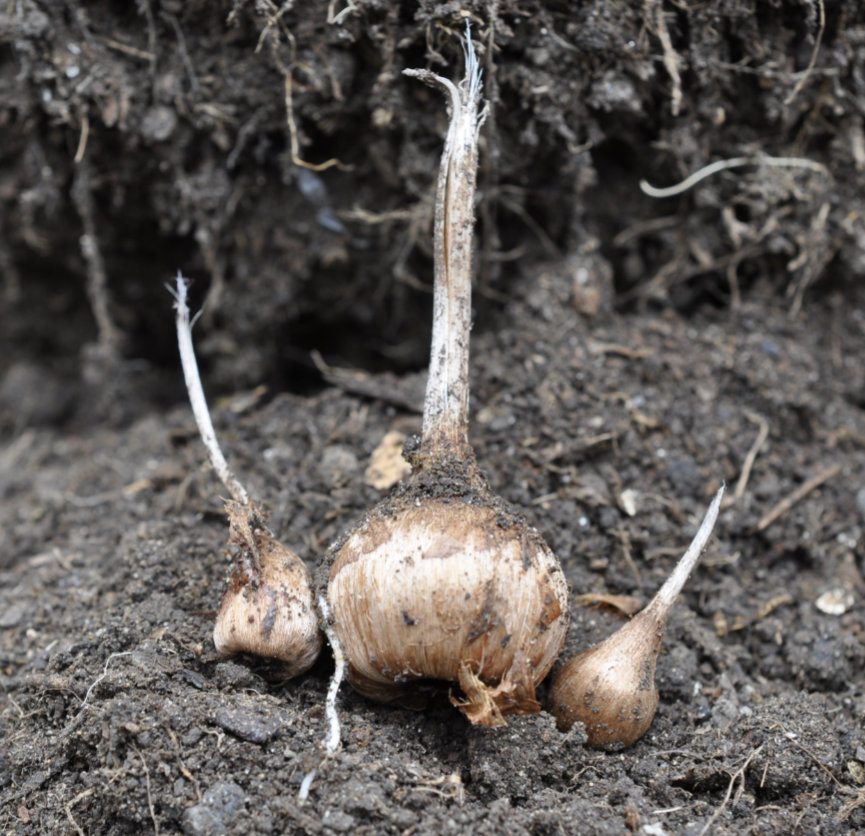
This large one (on the left in the above photo) has two visible daughter corms:

copyright © Kristi Ellinopoullos
They’re clearer here:
copyright © Kristi Ellinopoullos
Removing the other large one to its right, plus a bit more clearing again, revealed these four daughter corms behind it:

copyright © Kristi Ellinopoullos
More corms again — here you can see that the original corms were planted around 100 mm deep. From 100 to 150 mm is recommended:

copyright © Kristi Ellinopoullos
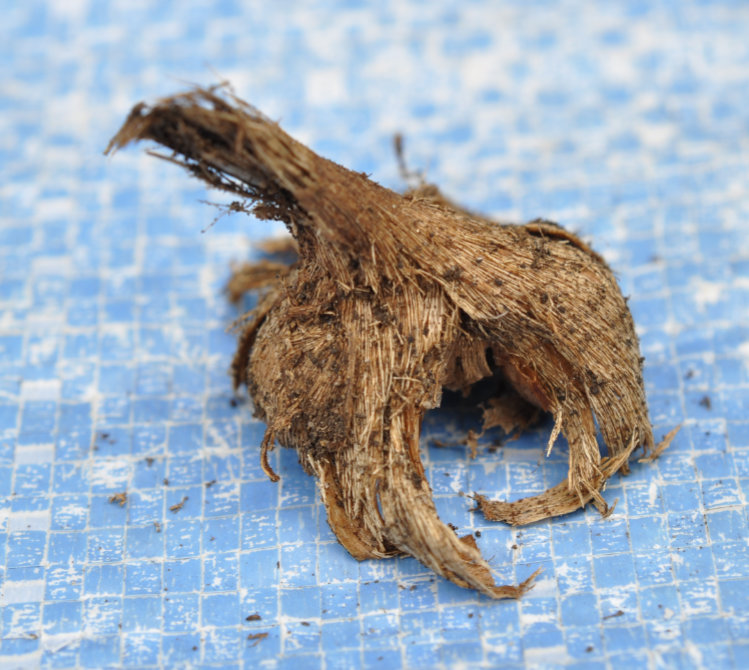
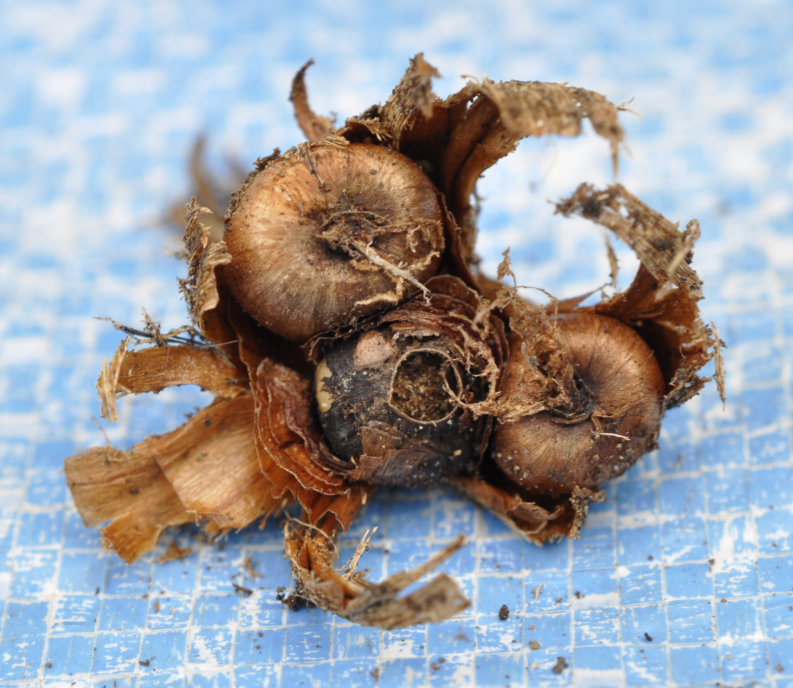
This one is cool. This is the tunic remains of a corm:
copyright © Kristi Ellinopoullos
There were three daughter corms inside!
copyright © Kristi Ellinopoullos
All up, my initial fifteen corms became forty-one ranging in size from roughly 40 mm diameter down to 7 mm diameter.

Related Products
 - from 1 Unit")
 in 50 mm Tube")
Leave a Comment